Air dry clay, a versatile medium for crafting, can sometimes harden, presenting a challenge to artists and hobbyists alike. At ultimatesoft.net, we provide you with effective methods, software solutions, and valuable insights to restore your clay to its original pliable state. Read on to discover proven techniques, explore innovative software applications, and delve into a treasure trove of tips and tricks that will unlock your creative potential with softened air dry clay, while also exploring related tools and resources available on ultimatesoft.net.
1. What is Air Dry Clay and Why Does it Harden?
Air dry clay, also known as self-hardening clay, is a modeling material that hardens at room temperature without the need for baking in a kiln or oven. It’s a favorite among crafters, educators, and artists due to its ease of use and accessibility.
1.1. Composition of Air Dry Clay
Air dry clay typically consists of a mixture of:
- Clay minerals: Provide the bulk and plasticity.
- Cellulose fibers: Add strength and prevent cracking.
- Water: Acts as a solvent and allows the clay to be molded.
- Binders: Hold the clay together during drying.
- Preservatives: Prevent mold growth.
1.2. The Hardening Process
The hardening of air dry clay is primarily due to the evaporation of water. As water molecules leave the clay, the particles bind closer together, resulting in a solid, rigid structure. This process is influenced by several factors:
- Exposure to air: The more air circulating around the clay, the faster it dries.
- Humidity: Low humidity accelerates drying, while high humidity slows it down.
- Temperature: Warmer temperatures promote faster evaporation.
- Thickness of the clay: Thicker pieces take longer to dry than thinner ones.
1.3. Why Does Air Dry Clay Harden Before Use?
Even when stored, air dry clay can harden if not properly sealed. Microscopic pores in packaging allow moisture to escape gradually. Additionally, repeated opening and closing of the package introduces fresh air, which contributes to the drying process.
2. Understanding the Science Behind Softening Air Dry Clay
To effectively soften air dry clay, it’s crucial to understand the underlying science. The goal is to reintroduce moisture into the clay, thereby loosening the bonds between the particles and restoring its plasticity.
2.1. Rehydration: The Key to Softening
Rehydration involves adding water back into the clay matrix. Water molecules penetrate the hardened clay, weakening the intermolecular forces and allowing the clay particles to move more freely.
2.2. Even Distribution of Moisture
Evenly distributing moisture is essential to prevent the clay from becoming lumpy or uneven in texture. This can be achieved through kneading and thorough mixing.
2.3. Preventing Mold Growth
Introducing moisture also creates an environment conducive to mold growth. Therefore, it’s important to use clean water and tools, and to monitor the clay for any signs of mold.
3. Methods to Soften Air Dry Clay
Several methods can be employed to soften hardened air dry clay, each with its own advantages and limitations.
3.1. The Water and Plastic Bag Method
This is one of the simplest and most effective methods for softening air dry clay.
3.1.1. Materials Needed
- Hardened air dry clay
- Plastic bags (resealable)
- Water
- Knife or poking tool
3.1.2. Step-by-Step Instructions
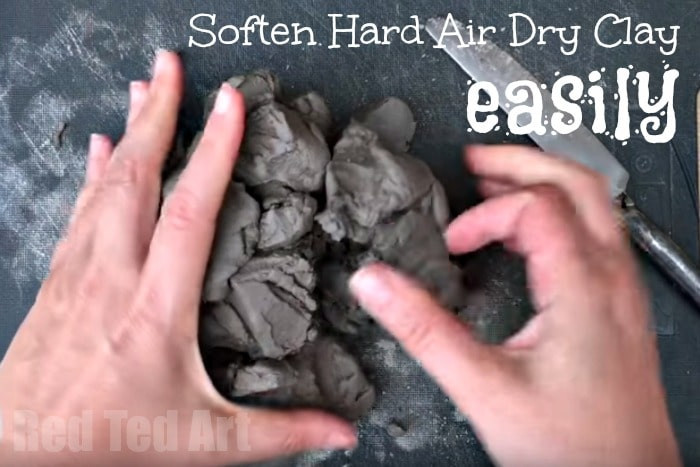
- Prepare the Clay: Place the hardened clay in a plastic bag. Use a knife or poking tool to create several small holes in the clay.
 Chuẩn bị đất sét khô cứng trong túi nilon
- Add Water: Pour a small amount of water (start with a tablespoon) into the bag. Ensure the water comes into contact with the clay.
- Seal the Bag: Seal the plastic bag tightly, removing as much air as possible.
- Wait and Monitor: Leave the bag for 24-48 hours, allowing the water to penetrate the clay. Check the clay periodically to assess its consistency.
- Knead and Adjust: Once the clay has softened, remove it from the bag and knead it thoroughly. If it’s still too hard, add a little more water and repeat the process. If it’s too soft, let it air dry slightly before use.
3.1.3. Tips and Tricks
- Use distilled water to minimize the risk of introducing impurities.
- For extremely hard clay, wrap it in a damp cloth before placing it in the plastic bag.
- If the clay becomes too sticky, sprinkle a small amount of cornstarch or flour onto your work surface while kneading.
3.2. The Damp Cloth Method
This method is ideal for softening smaller pieces of clay or for maintaining the moisture level of clay during a project.
3.2.1. Materials Needed
- Hardened air dry clay
- Clean cloth or paper towel
- Water
- Resealable container
3.2.2. Step-by-Step Instructions
- Dampen the Cloth: Moisten a clean cloth or paper towel with water. Wring out the excess water so that the cloth is damp but not dripping.
- Wrap the Clay: Wrap the hardened clay in the damp cloth.
- Seal in a Container: Place the wrapped clay in a resealable container. This will help retain moisture and prevent the clay from drying out too quickly.
- Wait and Monitor: Leave the clay in the container for several hours or overnight. Check the clay periodically to assess its consistency.
- Knead and Adjust: Once the clay has softened, remove it from the cloth and knead it thoroughly. If it’s still too hard, re-wrap it in the damp cloth and repeat the process.
3.2.3. Tips and Tricks
- Use a spray bottle to lightly mist the cloth with water, ensuring even dampness.
- Avoid using colored or scented cloths, as these may transfer dyes or fragrances to the clay.
- If the clay starts to develop mold, discard it immediately.
3.3. The Glycerin Method
Glycerin, also known as glycerol, is a humectant, meaning it attracts and retains moisture. Adding glycerin to air dry clay can help soften it and improve its workability.
3.3.1. Materials Needed
- Hardened air dry clay
- Glycerin
- Water
- Plastic bag or container
3.3.2. Step-by-Step Instructions
- Prepare the Glycerin Solution: Mix a small amount of glycerin (start with a teaspoon) with an equal amount of water.
- Apply the Solution: Gradually add the glycerin solution to the hardened clay, kneading it in as you go. Be careful not to add too much liquid at once, as this can make the clay too sticky.
- Seal and Wait: Place the clay in a plastic bag or container and seal it tightly. Leave it for several hours or overnight, allowing the glycerin to penetrate the clay.
- Knead and Adjust: Once the clay has softened, remove it from the bag and knead it thoroughly. If it’s still too hard, add a little more glycerin solution and repeat the process.
3.3.3. Tips and Tricks
- Glycerin can be found at most pharmacies or craft stores.
- Use food-grade glycerin if you’re concerned about toxicity.
- Glycerin can make the clay slightly more translucent, which may be desirable for certain projects.
3.4. The Vinegar Method
Vinegar can also be used to soften air dry clay, although it’s important to use it sparingly, as it can alter the clay’s properties.
3.4.1. Materials Needed
- Hardened air dry clay
- White vinegar
- Water
- Plastic bag or container
3.4.2. Step-by-Step Instructions
- Prepare the Vinegar Solution: Mix a small amount of white vinegar (start with a teaspoon) with an equal amount of water.
- Apply the Solution: Gradually add the vinegar solution to the hardened clay, kneading it in as you go. Be careful not to add too much liquid at once, as this can make the clay too sticky.
- Seal and Wait: Place the clay in a plastic bag or container and seal it tightly. Leave it for several hours or overnight, allowing the vinegar to penetrate the clay.
- Knead and Adjust: Once the clay has softened, remove it from the bag and knead it thoroughly. If it’s still too hard, add a little more vinegar solution and repeat the process.
3.4.3. Tips and Tricks
- Vinegar can help break down lumps and improve the clay’s texture.
- The vinegar scent will dissipate as the clay dries.
- Test this method on a small piece of clay first to ensure it doesn’t adversely affect the clay’s color or consistency.
4. Software Solutions for Crafting with Clay
In the digital age, software solutions can greatly enhance the crafting experience, offering tools for design, planning, and even simulating clay creations. Ultimatesoft.net provides a range of software options to assist you in your clay projects.
4.1. 3D Modeling Software
3D modeling software allows you to create virtual clay sculptures before working with the real material. This can help you visualize your ideas, experiment with different forms, and plan your project more effectively.
4.1.1. Popular Options
- Blender: A free and open-source 3D creation suite.
- Sculptris: A free and user-friendly sculpting tool.
- ZBrush: An industry-standard digital sculpting software.
4.1.2. Benefits
- Design Visualization: See your creation from all angles before starting.
- Experimentation: Try out different shapes and textures without wasting clay.
- Precision: Achieve precise measurements and proportions.
4.2. Project Management Software
Project management software can help you organize your clay projects, track your progress, and manage your materials.
4.2.1. Popular Options
- Trello: A visual project management tool.
- Asana: A versatile project management platform.
- Microsoft Project: A comprehensive project management solution.
4.2.2. Benefits
- Organization: Keep track of your project’s steps and deadlines.
- Resource Management: Manage your clay, tools, and other materials efficiently.
- Collaboration: Share your project with others and collaborate effectively.
4.3. Image Editing Software
Image editing software can be used to enhance photos of your clay creations, create digital artwork inspired by clay, and design custom textures for your projects.
4.3.1. Popular Options
- Adobe Photoshop: An industry-standard image editing software.
- GIMP: A free and open-source image editor.
- Canva: A user-friendly graphic design tool.
4.3.2. Benefits
- Photo Enhancement: Improve the appearance of your clay creations in photos.
- Digital Art: Create digital artwork inspired by clay textures and forms.
- Custom Textures: Design custom textures to apply to your clay projects.
5. Preventing Air Dry Clay from Hardening
Prevention is always better than cure. By taking proactive steps, you can minimize the risk of your air dry clay hardening prematurely.
5.1. Proper Storage Techniques
Proper storage is crucial to maintaining the moisture level of air dry clay.
5.1.1. Airtight Containers
Store your clay in airtight containers to prevent moisture from escaping. Resealable plastic bags, plastic containers with tight-fitting lids, and glass jars are all good options.
5.1.2. Double Bagging
For extra protection, double bag your clay. Place the clay in one plastic bag, seal it tightly, and then place that bag inside another plastic bag.
5.1.3. Adding Moisture
To further prevent drying, place a damp sponge or paper towel inside the container with the clay. Be sure to check the sponge or paper towel regularly and re-wet it as needed.
5.2. Maintaining Humidity
Maintaining a humid environment can also help prevent air dry clay from hardening.
5.2.1. Humidifiers
Use a humidifier in your crafting area to increase the humidity level. This is especially helpful in dry climates.
5.2.2. Water Bowls
Place bowls of water around your crafting area. As the water evaporates, it will increase the humidity level.
5.3. Avoiding Direct Sunlight and Heat
Direct sunlight and heat can accelerate the drying process. Store your clay in a cool, dark place away from direct sunlight and heat sources.
6. Reviving Severely Hardened Air Dry Clay
Sometimes, despite your best efforts, air dry clay can become severely hardened. In such cases, more aggressive methods may be required.
6.1. The Boiling Water Method
This method involves submerging the hardened clay in boiling water to rehydrate it.
6.1.1. Materials Needed
- Severely hardened air dry clay
- Boiling water
- Heat-resistant bowl
- Plastic bag
6.1.2. Step-by-Step Instructions
- Prepare the Clay: Break the hardened clay into smaller pieces.
- Submerge in Boiling Water: Place the clay pieces in a heat-resistant bowl and pour boiling water over them.
- Cover and Soak: Cover the bowl with a lid or plastic wrap and let the clay soak for several hours or overnight.
- Drain and Knead: Drain the water from the bowl and let the clay cool slightly. Then, remove the clay from the bowl and knead it thoroughly.
- Adjust Consistency: If the clay is too wet, let it air dry slightly. If it’s still too hard, repeat the soaking process.
6.1.3. Precautions
- Use caution when working with boiling water to avoid burns.
- This method may alter the clay’s texture and consistency.
- Test this method on a small piece of clay first to ensure it doesn’t adversely affect its properties.
6.2. The Food Processor Method
This method involves using a food processor to break down the hardened clay into smaller particles, making it easier to rehydrate.
6.2.1. Materials Needed
- Severely hardened air dry clay
- Food processor
- Water
- Plastic bag
6.2.2. Step-by-Step Instructions
- Break Down the Clay: Break the hardened clay into smaller pieces that will fit into the food processor.
- Process the Clay: Place the clay pieces in the food processor and pulse until they are broken down into small particles.
- Add Water: Gradually add water to the food processor, pulsing as you go, until the clay forms a paste-like consistency.
- Seal and Wait: Transfer the clay paste to a plastic bag and seal it tightly. Leave it for several hours or overnight, allowing the water to fully penetrate the clay.
- Knead and Adjust: Remove the clay from the bag and knead it thoroughly. If it’s still too hard, add a little more water and repeat the process.
6.2.3. Precautions
- Use a food processor that you don’t mind getting dirty, as clay can be difficult to remove.
- Be careful not to over-process the clay, as this can make it too sticky.
- Clean the food processor thoroughly after use to prevent contamination.
7. Advanced Techniques for Working with Air Dry Clay
Once you’ve mastered the art of softening air dry clay, you can explore advanced techniques to elevate your crafting skills.
7.1. Adding Texture
Adding texture to your clay creations can create visual interest and depth.
7.1.1. Tools for Texturing
- Stamps: Use rubber stamps, wooden stamps, or custom-made stamps to create patterns on the clay surface.
- Texturing Tools: Use specialized texturing tools, such as combs, brushes, or sculpting tools, to create unique textures.
- Natural Objects: Use natural objects, such as leaves, shells, or stones, to imprint textures onto the clay.
7.1.2. Techniques
- Pressing: Press the texturing tool or object firmly onto the clay surface.
- Rolling: Roll the texturing tool or object across the clay surface.
- Stamping: Stamp the texturing tool onto the clay surface.
7.2. Adding Color
Adding color to your clay creations can bring them to life and enhance their visual appeal.
7.2.1. Methods for Coloring
- Acrylic Paints: Paint your clay creations with acrylic paints after they have dried.
- Clay Dyes: Use specialized clay dyes to color the clay before it dries.
- Powdered Pigments: Mix powdered pigments into the clay to create custom colors.
7.2.2. Tips and Tricks
- Apply multiple thin coats of paint for a smooth, even finish.
- Seal your painted clay creations with a clear varnish to protect the paint and prevent chipping.
- Experiment with different color combinations and techniques to create unique effects.
7.3. Sealing and Finishing
Sealing and finishing your clay creations can protect them from damage and enhance their appearance.
7.3.1. Sealants
- Varnish: Apply a clear varnish to seal your clay creations and protect them from moisture and UV damage.
- Polyurethane: Use a polyurethane sealant for a durable, water-resistant finish.
- Resin: Coat your clay creations with resin for a glossy, glass-like finish.
7.3.2. Finishing Techniques
- Sanding: Sand your clay creations before sealing them to remove any imperfections and create a smooth surface.
- Polishing: Polish your sealed clay creations to enhance their shine and luster.
- Waxing: Apply a wax finish to protect the sealant and add a subtle sheen.
8. Air Dry Clay Projects for All Skill Levels
Air dry clay is a versatile medium that can be used to create a wide variety of projects, from simple crafts to intricate sculptures.
8.1. Beginner Projects
- Pinch Pots: Create small bowls or containers by pinching and shaping the clay.
- Ornaments: Make festive ornaments by cutting out shapes from the clay and decorating them.
- Beads: Roll small balls of clay and string them together to create necklaces or bracelets.
8.2. Intermediate Projects
- Sculptures: Create small sculptures of animals, people, or objects.
- Jewelry: Make earrings, pendants, or rings by shaping and decorating the clay.
- Home Decor: Create decorative items, such as vases, candle holders, or picture frames.
8.3. Advanced Projects
- Detailed Figurines: Create intricate figurines with fine details and realistic features.
- Complex Sculptures: Design and create large-scale sculptures with multiple components.
- Mixed Media Art: Combine air dry clay with other materials, such as wood, metal, or fabric, to create mixed media art pieces.
9. Troubleshooting Common Air Dry Clay Problems
Working with air dry clay can sometimes present challenges. Here are some common problems and how to solve them.
9.1. Cracking
Cracking is a common problem with air dry clay, especially in thicker pieces.
9.1.1. Causes
- Rapid Drying: Drying the clay too quickly can cause it to crack.
- Uneven Drying: Uneven drying can create stress points that lead to cracking.
- Thick Sections: Thick sections of clay are more prone to cracking than thin sections.
9.1.2. Solutions
- Slow Drying: Dry the clay slowly and evenly by covering it with plastic wrap or a damp cloth.
- Hollowing Out: Hollow out thick sections of clay to reduce the risk of cracking.
- Reinforcing: Reinforce weak areas with wire or mesh.
9.2. Warping
Warping occurs when the clay changes shape during drying.
9.2.1. Causes
- Uneven Drying: Uneven drying can cause the clay to warp.
- Gravity: Gravity can pull the clay out of shape as it dries.
- Support: Lack of support can cause the clay to warp.
9.2.2. Solutions
- Even Drying: Dry the clay evenly by rotating it and covering it with plastic wrap.
- Support: Support the clay with props or molds to prevent warping.
- Weight: Place weights on the clay to keep it flat during drying.
9.3. Mold Growth
Mold can grow on air dry clay if it’s not stored properly or if it’s exposed to moisture.
9.3.1. Prevention
- Proper Storage: Store the clay in an airtight container with a desiccant to prevent mold growth.
- Cleanliness: Use clean water and tools to prevent contamination.
- Ventilation: Provide good ventilation to prevent moisture buildup.
9.3.2. Treatment
- Discard: If mold is present, discard the clay immediately.
- Clean: Clean the affected area with bleach to prevent further mold growth.
10. Where to Find High-Quality Air Dry Clay and Software Resources
Finding the right materials and resources is essential for successful air dry clay projects.
10.1. Reputable Clay Suppliers
- Local Craft Stores: Check your local craft stores for a variety of air dry clay brands and types.
- Online Retailers: Explore online retailers, such as Amazon or Blick Art Materials, for a wide selection of clay products.
- Specialty Suppliers: Look for specialty clay suppliers that offer unique or hard-to-find clay types.
10.2. Software Download and Information at ultimatesoft.net
Visit ultimatesoft.net to explore a comprehensive collection of software downloads, detailed reviews, and up-to-date information on software applications that can enhance your air dry clay crafting experience. Whether you need 3D modeling tools, project management software, or image editing applications, ultimatesoft.net provides the resources you need to take your crafting to the next level.
10.3. Educational Resources
- Online Tutorials: Find online tutorials and videos that demonstrate various air dry clay techniques.
- Workshops: Attend workshops or classes to learn from experienced clay artists.
- Books: Read books and articles about air dry clay to expand your knowledge and skills.
By following these guidelines and exploring the resources available at ultimatesoft.net, you can master the art of softening air dry clay and create stunning works of art. Don’t let hardened clay limit your creative potential – unlock your imagination and bring your artistic visions to life!
For more information and software solutions, visit ultimatesoft.net. Our address is 450 Serra Mall, Stanford, CA 94305, United States. You can also reach us at +1 (650) 723-2300.
FAQ: Frequently Asked Questions About Softening Air Dry Clay
1. Can you soften air dry clay after it’s completely hardened?
Yes, air dry clay can be softened even after it’s completely hardened, but it might require more effort and patience. Methods like the water and plastic bag method, damp cloth method, or even the boiling water method can be employed. The key is to reintroduce moisture gradually and knead the clay thoroughly.
2. How long does it take to soften hardened air dry clay?
The time it takes to soften hardened air dry clay depends on how hard the clay is and the method used. It can take anywhere from a few hours to a few days. Regularly checking the clay’s consistency and adjusting the moisture level is crucial.
3. What’s the best method for softening a large amount of hardened air dry clay?
For large amounts of hardened air dry clay, the water and plastic bag method or the food processor method are often the most effective. These methods allow for even distribution of moisture and can break down the clay more efficiently.
4. Can I use lotion to soften air dry clay?
While some crafters suggest using lotion, it’s generally not recommended. Lotion can introduce oils and chemicals that may affect the clay’s consistency and drying time. It’s better to stick to water, glycerin, or vinegar solutions.
5. How do I prevent my air dry clay from cracking as it dries?
To prevent cracking, dry the clay slowly and evenly, avoid direct sunlight and heat, and hollow out thick sections. Covering the clay with plastic wrap or a damp cloth during drying can also help.
6. Is it possible to over-soften air dry clay?
Yes, it is possible to over-soften air dry clay. If the clay becomes too sticky or mushy, let it air dry slightly before use. You can also sprinkle a small amount of cornstarch or flour onto your work surface while kneading.
7. Can I mix different brands of air dry clay?
Mixing different brands of air dry clay is generally not recommended, as they may have different compositions and drying times. This can lead to uneven drying and cracking.
8. How should I store my air dry clay to prevent it from hardening?
Store your air dry clay in an airtight container, such as a resealable plastic bag or a plastic container with a tight-fitting lid. You can also add a damp sponge or paper towel to maintain humidity.
9. What are the signs that my air dry clay has gone bad?
Signs that air dry clay has gone bad include a foul odor, mold growth, or a slimy texture. If you notice any of these signs, discard the clay immediately.
10. Are there any software programs that can help with air dry clay projects?
Yes, there are several software programs that can help with air dry clay projects, including 3D modeling software, project management software, and image editing software. Visit ultimatesoft.net for more information and software solutions.
